더보기
package control;
public class Q4_1 {
public static void main(String[] args) {
int x = 10;
char ch = ' ';
int year = 430;
boolean powerOn = false;
String str = "yes";
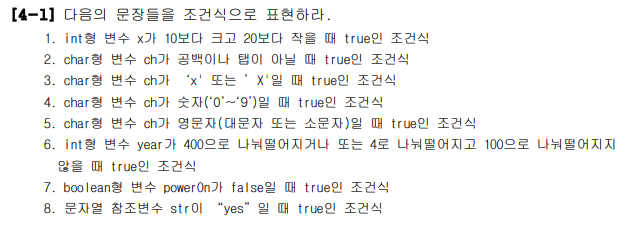
//1번
if(x > 10 && x <20) {
}
//2번
if(ch != ' ' || ch != '\t') {
}
//3번
if(ch == 'X' || ch == 'x') {
}
//4번
if(ch >= '0' && ch <= '9') {
}
//5번
if((ch >= 'A' && ch <= 'Z')||(ch >= 'a' && ch <='z')) {
}
//6번
if((year%400==0||year%4==0)&&(year%100!=0)) {
}
//7번
if(!powerOn) { //= if(powerOn!=true)
}
//8번
if(str.equals("yes")) {
}
}
}

더보기
73
package control;

public class Q4_2 {

public static void main(String[] args) {
int sum = 0;
for(int i = 1; i <= 20; i++) {
if(i % 2 != 0 && i %3 != 0) {
sum += i;
}
}
System.out.println("sum : "+sum);
}

}

더보기
220
package control;

public class Q4_3 {

	public static void main(String[] args) {
		int sum = 0;
		for(int i = 1; i<=10; i++) {
			for(int j = 1; j<=i; j++) {
				sum += j;
			}
		}
		System.out.println("sum : "+sum);
	}

}

더보기
199
package control;

public class Q4_4 {

	public static void main(String[] args) {
		int num = 0;
		int sum = 0; //총합
		int s = 1; //값의 부호를 바꿔주는 변수

		for(int i = 1; ; i++, s=-s) {
			num = i * s;
			sum += num;

			if(sum >= 100) break;
		}
		System.out.println("num : "+num);
		System.out.println("sum : "+sum);
	}

}

더보기
package control;

public class Q4_5 {

	public static void main(String[] args) {
		int i = 0;
		while(i <= 10) {
			int j = 0;
			while(j <=i) {
				System.out.print("*");
				j++;
			}
			System.out.println();
			i++;
		}
	}

}

더보기
>> 실행결과
[1, 5]
[2, 4]
[3, 3]
[4, 2]
[5, 1]
package control;

public class Q4_6 {

	public static void main(String[] args) {
		//주사위 2개 - 6x6 = 36가지
		for(int i = 1; i <= 6; i++) {
			for(int j = 1; j <= 6; j++) {
				if(i+j==6) {
					System.out.printf("[%d, %d]\n",i,j);
				}
			}
		}
	}

}

더보기
package control;

public class Q4_7 {

	public static void main(String[] args) {
		int value = (int)(Math.random()*6)+1;
		System.out.println("value:"+value);
	}

}

더보기
package control;

public class Q4_8 {

	public static void main(String[] args) {
		for(int x = 0; x < 11; x++) {
			for(int y = 0; y < 11; y++) {
				if(2*x+4*y==10) {
					System.out.printf("x=%d, y=%d\n",x,y);
				}
			}
		}
	}

}
더보기
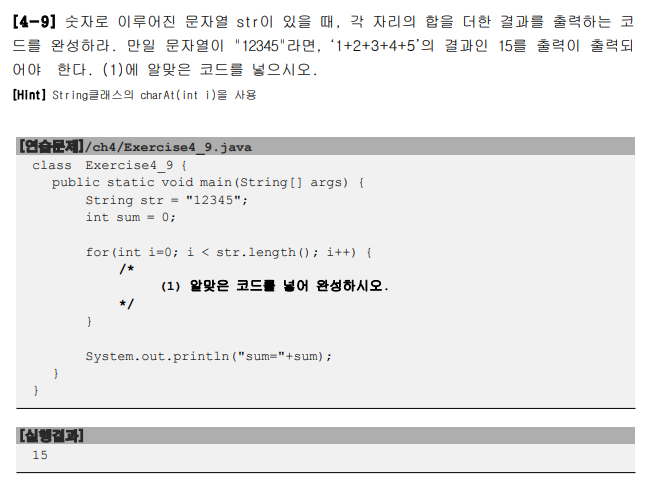
int tmp = str.charAt(i)-'0';
sum += tmp;

더보기
int tmp = num;

while(tmp>0) {
    sum += tmp%10;
    tmp = tmp/10;
}
더보기
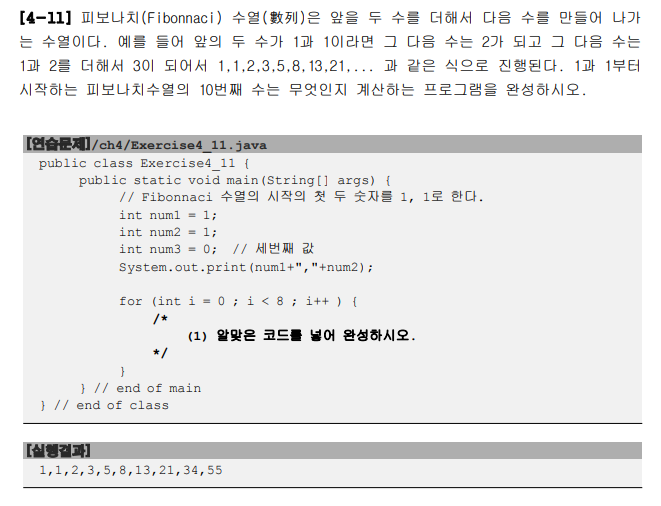
package control;

public class Q4_11 {

	public static void main(String[] args) {
		int num1 = 1;
		int num2 = 1;
		int num3 = 0;

		System.out.print(num1+","+num2);

		for(int i = 0; i < 8; i++) {
			num3 = num1 + num2;
			System.out.print(","+num3);
			num1 = num2;
			num2 = num3;
		}
	}

}


더보기
package control;

public class Q4_13 {

	public static void main(String[] args) {
		String value = "12o34";
		char ch = ' ';
		boolean isNumber = true;

		for(int i = 0; i < value.length(); i++) {
			ch = value.charAt(i);
			if(!(ch >= '0' && ch <= '9')) {
				isNumber = false;
				break;
			}
		}

		if(isNumber) {
			System.out.println(value+"는 숫자입니다.");
		}else {
			System.out.println(value+"는 숫자가 아닙니다.");
		}
	}

}

더보기
package control;

public class Q4_14 {

	public static void main(String[] args) {
		int answer = (int)(Math.random()*100)+1; //1~100사이 컴터숫자
		int input = 0; //사용자 입력숫자
		int count = 0; //시도횟수

		java.util.Scanner s = new java.util.Scanner(System.in);

		do {
			count++;
			System.out.print("1과 100사이의 값을 입력하세요 : ");
			input = s.nextInt();

			if(input == answer) {
				System.out.println("맞췄습니다.");
			}else if(input > answer) {
				System.out.println("더 작은 수를 입력하세요.");
			}else{
				System.out.println("더 큰 수를 입력하세요.");
			}

			if(count >= 6) {
				System.out.println("시도횟수는 6번입니다.");
				break;
			}
		}while(true);

		s.close();
	}

}

더보기
package control;

public class Q4_15 {

	public static void main(String[] args) {
		int number = 12321;
		int tmp = number;

		int result = 0; //변수 number를 거꾸로 변환해서 담을 변수

		while(tmp != 0) {
			result = result*10+tmp%10;
			tmp = tmp/10;
		}

		if(number == result)
			System.out.println(number + "는 회문수 입니다.");
		else
			System.out.println(number + "는 회문수가 아닙니다.");
	}

}
'Language > Java' 카테고리의 다른 글
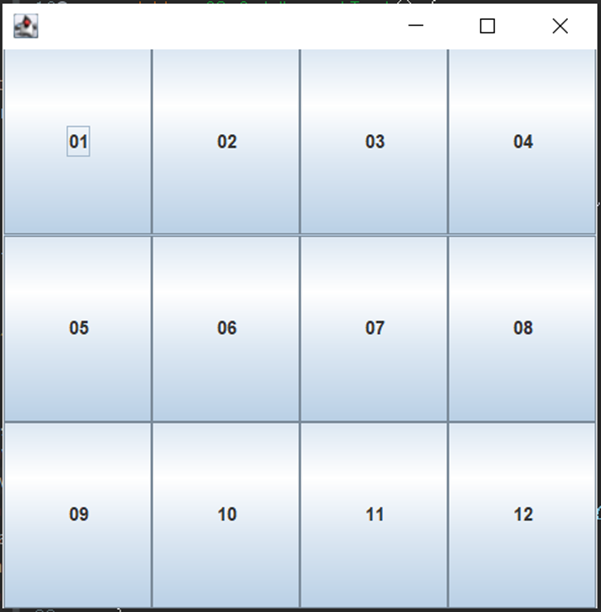
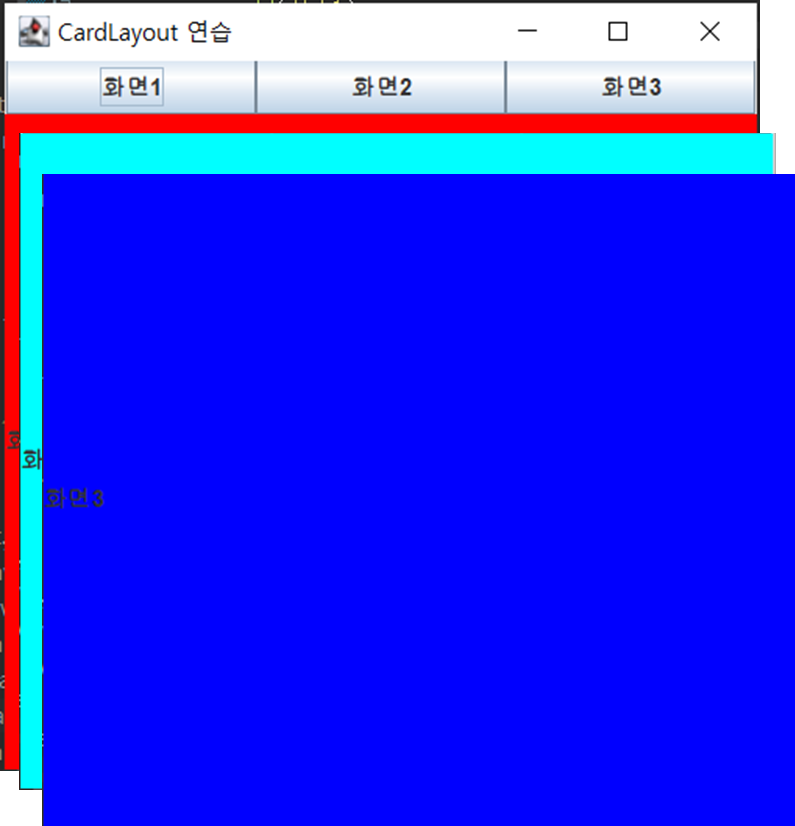
| [자바API_AWT/Swing] 배치관리자와 레이아웃 종류(2)_윈도우창(JFrame) 예제 (0) | 2022.03.27 |
|---|---|
| [자바의정석_예제] 객체지향프로그래밍1 (0) | 2022.03.27 |
| [자바API_AWT/Swing] 배치관리자와 레이아웃 종류 (0) | 2022.03.26 |
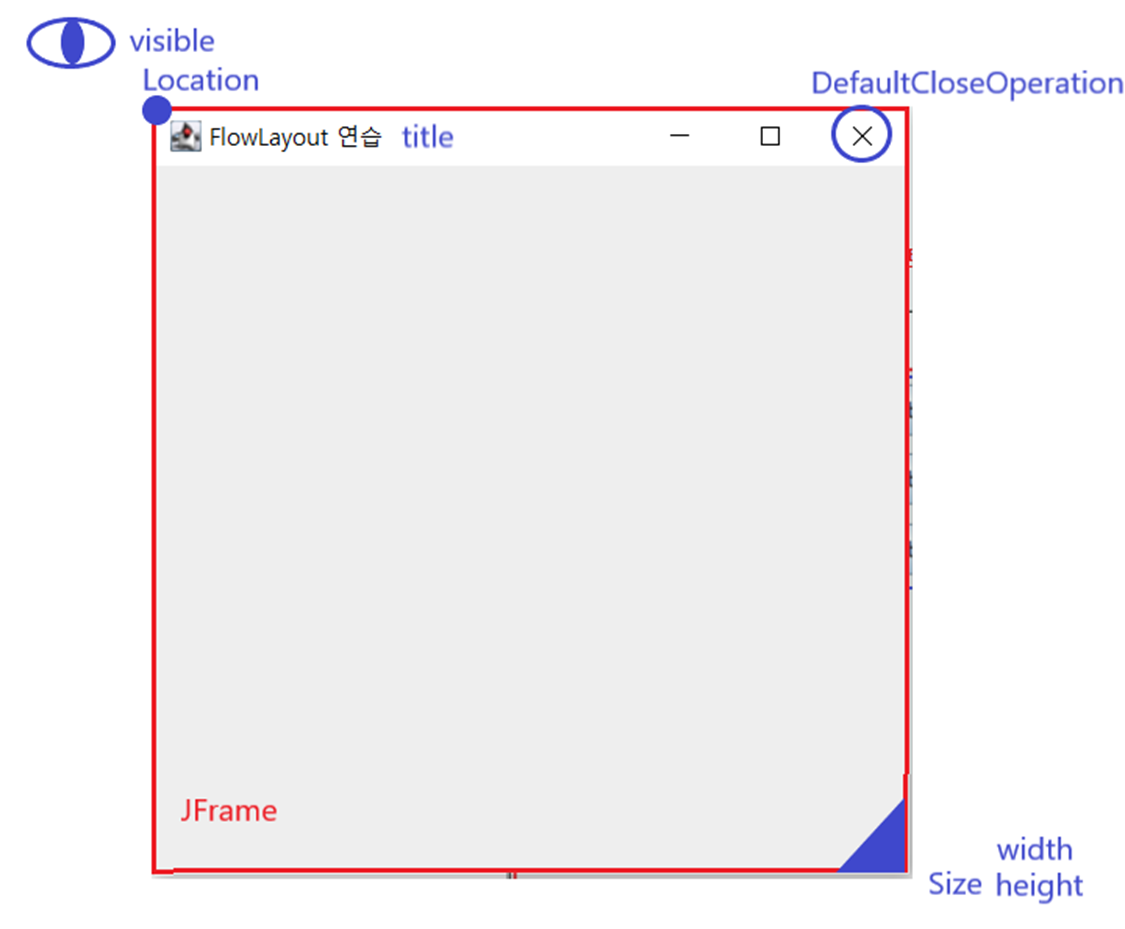
| [자바API_AWT/Swing] JFrame 컨테이너로 윈도우창 만들기 (0) | 2022.03.26 |
| [자바API_AWT/Swing] GUI (Graphic User Interface)의 기초 (0) | 2022.03.26 |