- 일반적으로 RequestParameter는 ?key=value와 같이 단일 데이터를 넘겨 받고,
RequestBody는 x-www-form-urlencoded나 Json과 같이 특정 데이터 포맷으로 묶여서 담겨지는 경우가 많다.
- Post 방식으로 넘겨 받는 URI 모습
*body 값으로 다양한 데이터 포맷이 존재하는 걸 볼 수 있다.
| 실험
- POST 방식으로 Body에 담겨 넘어오는 데이터의 타입을 크게 두 가지로 분류해보았다. (물론 데이터 타입은 더 다양하다)
1) x-www-form-urlencoded (form 디폴트 타입)
2) json 타입
- Annotation, @RequestParam, @RequestBody에 따라
두 가지 타입의 데이터를 어떻게 읽어오는지 아래의 메소드들을 사용해서 확인해보았다.
// 아래 각 케이스에 대하여 x-www-form / json 타입의 요청을 전달한다.

// case 1 : 단일 데이터 + @RequestParam
@PostMapping("/register")
public void register(@RequestParam String id){
    System.out.println(id);
}

// case 2 : 단일 데이터 + @RequestBody
@PostMapping("/register2")
public void register2(@RequestBody String id){
    System.out.println(id);
}

// case 3 : 객체 데이터 + @RequestParam
@PostMapping("/register3")
public void register3(@RequestParam UserRegister userRegister){
    System.out.println(userRegister); //
}

// case 4 : 객체 데이터 + @RequestBody
@PostMapping("/register4")
public void register4(@RequestBody UserRegister userRegister){
    System.out.println(userRegister); //
}

----- ++ 추가적으로 Annotion 미사용시 케이스도 확인

// case 5 : 단일 데이터 + Annotation 없음
@PostMapping("/register5")
public void register5(String id){
    System.out.println(id); //
}

// case 6 : 객체 데이터 + Annotation 없음
@PostMapping("/register6")
public void register6(UserRegister userRegister){
    System.out.println(userRegister); //
}
| 결과
x-www-form-urlencoded
json
단일
객체
단일
객체
요청 )
id=test1234
id=test1234&pwd=1234
{ "id":"test1234" }
{ "id": "test1234", "pwd":"1234" }
@RequestParam
test1234
400 에러**
400 에러*
400에러****
@RequestBody
id=test1234
415 에러***
{ "id":"test1234" }
UserRegister(id=test1234, pwd=null)
Annotation 없음
test1234
com.example.demo.dto.UserRegister@498727e7
null
com.example.demo.dto.UserRegister@498727e7
*400 : Required request parameter 'id' for method parameter type String is not present
**400 : Required request parameter 'userRegister' for method parameter type UserRegister is not present
***415 : Content type 'application/x-www-form-urlencoded;charset=UTF-8' not supported
****400 : Required request parameter 'userRegister' for method parameter type UserRegister is not present
| 정리
- @RequestParam은 x-www-form-urlencoded 타입의 단일 변수 값을 읽어올 수 있다.
- 지난 번 스프링을 처음 배울 당시 아래와 같이 Validation에 대한 개념을 배웠었다.
✅ Validation은 유효성 검증을 말하며, 주로 HTTP Request에서 잘못된 내용을 검증할 때 사용한다. - 데이터 검증 : 필수 데이터 / 문자열 길이 및 숫자형 데이터 범위 / 이메일 및 신용카드 번호 등 형식 확인 - 비즈니스 검증 : 서비스 정책에 따라 데이터 검증 ✅ Validation 방식 1) Java Bean Validation : dto클래스 맴버에 Annotaion(ex. @NotBlank, @Size, @Email...)을 붙이는 방식 2) Spring validator 인터페이스 구현을 통한 validation ✅ Validation 주의사항 : Validation을 멀리 두면 테스트 및 유지보수성이 떨어지므로 가능한 Annotaion방식을 쓰는 게 좋다. * 수업에서의 제안 : 1차로 dto에 Annotation방식 사용, 2차로 비즈니스 검증 후 실패 시 Custom Exception throw
- 오늘은 계좌 프로그램의 계좌 생성 기능에 대한 단위 테스트를 하면서 위 데이터를 검증하고, 비즈니스 로직을 검정하는 실습해보았다.
- 이것을 연습 삼아서 동물 병원 차트를 생성하는 걸로 바꿔서 해보았다.
1. 데이터 검증하기 - Common Validation Annotations(Java Bean Validation)
@NotNull: to say that a field must not be null.
@NotEmpty: to say that a list field must not empty.
@NotBlank: to say that a string field must not be the empty string (i.e. it must have at least one character).
@Min and @Max: to say that a numerical field is only valid when it’s value is above or below a certain value.
@Pattern: to say that a string field is only valid when it matches a certain regular expression.
@Email: to say that a string field must be a valid email address.
[ 예시 ] 동물 병원 차트 생성 DTO - Request와 Response 시 Data-binding용 - 요청시 : 주인 id와 동물 id는 반드시 받아 존재하는지 확인한다. / 차트에 메모와 진단이 있을 수도 있고 없을 수도 있다. - 응답시 : 생성된 차트의 차트번호 반환
// import 생략

public class CreateChart{

   // lombok 게터/세터/생성자 생략
   public static class Request{
    	@NotNull
        @Min(1)
    	private Long ownerId;
        @NotNull
        @Min(1)
        private Long patientId;
        private String memo;
        private String diagonose;
   }

   // lombok 게터/세터/생성자 생략
   public static class Response{
        @NotNull
        private String chartNo;
   }

   public static Response from(ChartDto chartDto){
        return Response.builder()
        	.ownerId(chartDto.getOwnerId())
        	.patientId(chartDto.getPatientId())
        	.memo(chartDto.getMemo())
        	.diagonose(chartDto.getDiagnose())
        	.build();
   }

}
[2] DTO : 도메인에서 필요한 데이터만 넘겨주는 객체 생성
* 지연 로딩을 위해서 필요한 객체이다. (지연 로딩이란? JPA에서 프록시 객체 - 참조값을 가진다 - 로 Entity간 연관관계를 주입할 때, 한 번에 모든 데이터를 올리는 것이 아니라 필요에 따라 지연하여 데이터를 로딩하는 방식)
* 지연 로딩을 하게 되면 사용자의 요청사항에 유연하게 반응할 수 있다.
// import 생략

// lombok 관련 annotation 생략
public class ChartDto {
    private String chartNo;
    private LocalDateTime createdAt;
    private LocalDateTime updatedAt;

    public static ChartDto fromEntity(Chart chart){
    	return ChartDto.builder()
            .chartNo(chart.getChartNo())
            .createdAt(chart.getCreatedAt())
            .updatedAt(chart.getUpdatedAt())
            .build();
    }
}
[3] Controller에서 @Valid로 요청 시 데이터 제약사항 검증하기
[ 예시 ] 동물 병원 차트 생성 컨트롤러 - REST 방식의 컨트롤러
POST http://ip주소:port번호/chart content-type: application/json
{ "ownerId": 1, "name": "여름이" }
// import 생략

@RestController
@RequiredArgsConstructor
public class ChartController{
    private final ChartService chartService;

    @PostMapping("/chart")
    public CreateChart.Response createChart(@RequestBody @Valid CreateChart.Request request){

        return CreateChart.Response.from(
        	chartService.createChart(
        		request.getOwnerId(),
        		request.getPatientId(),
        	)
        );

    }
}
2. 비즈니스 로직 검증하기 - Custom Exception
[1] exception : 예외사항에 대한 Custom Exception을 만든다.
(1) 먼저 Enum으로 예외 코드를 만든다. (2) 해당 Enum을 담은 커스텀 Exception을 만든다.
// import 생략

@Getter
@AllArgsConstructor
public Enum ErrorCode {
    OWNER_NOT_FOUND("주인이 없습니다."),
    PATIENT_NOT_FOUND("환자가 없습니다."),
    CHART_NO_NOT_FOUND("차트번호를 찾을 수 없습니다.")

    private String description;
}
// import 생략

// lombok 생략
public class ChartException extends RuntimeException {
    ErrorCode errorCode;
    String errorMessage;

    public ChartException(ErrorCode errorCode) {
    	this.errorCode = errorCode;
        this.errorMessage = errorCode.getDescription();
    }
}
[2] service : 비즈니스 로직에 따라 서비스 객체 생성하기
[ 예시 ] 동물 병원 차트 생성 서비스 - 비즈니스 로직 검증 - 주인이 있는지 조회하기 - 동물이 있는지 조회하기 - 동물의 차트가 100개를 넘어가는지 확인 (*validate를 위해 임의로 만든 것) - 최신 차트 번호 생성 - 차트 저장 후, 차트 정보를 넘긴다.
// import 생략

@Service
@RequiredArgsConstructor
public class ChartService {
    private final ChartRepository chartRepository;
    private final OwnerRepository OwnerRepository;
    private final PatientRepository PatientRepository;

    @Transactional
    public ChartDto createChart(Long ownerId, Long patinetId){
    	Onwer owner = ownerRepositroy.findById(ownerId)
        	.orElseThrow(() -> new ChartException(ErrorCode.OWNER_NOT_FOUND));

        Patient patient = patientRepository.findById(patientId)
        	.orElseThrow(() -> new ChartException(ErrorCode.PATIENT_NOT_FOUND));

        // 차트 100개 넘는지 별도로 validate 처리
        // -- [ctrl]+[alt]+[M]으로 메소드를 extract
        validate(patient);

        String chartNo = chartRepository.findFirstByOrderByIdDesc()
        	.map(chart -> (Integer.parseInt(chart.getChartNo().substring(2) + 1)) + "")
        	.orElseThrow(() -> new ChartException(ErrorCode.CHART_NO_NOT_FOUND));

        return ChartDto.fromEntity(
        	chartRepository.save(
            	Chart.builder()
                	//생략
                	.build()
            )
        );
    }

    public void validate (Patient patient) {
    	if (chartRepository.CountByPatient(patient) == 100) {
        	throw new ChartException(ErrorCode.MAX_CHART_COUNT_100);
        }
    }
}
- 앞에서 만들었던 동물병원 진료 예약 시스템에서, 동물을 Patient로 해서 만들어봤다.
간단한 내역만 적어두었는데, Entity에 관한 Annotation import를 보면 persistence가 패키지명으로 들어간 게 보인다.
- 다시 말해 @Entity 표시만 해두고, @Id나 @GeneratedValue로 pk를 설정하면 알아서 DB에 영구 반영시키겠단 말이다.
- 그리고 @EntityListener는 이 과정에서 발생하는 이벤트 상황을 원하는 바에 따라 읽어오겠다는 이야기이다.
- 그런데 잠시 고민해야 하는 부분이 더 있다.
- @EntityListener를 저렇게 표시만 해둔다고 쓸 수는 없단다.
Listener는 말 그대로 이벤트가 발생할 때까지 귀기울여 대기하는 녀석이기에,
대기할 수 있게 미리 DI Container에 넣어주어야 한다.
| AuditingEntityConfig 클래스를 만들기
- 우리는 EntityListener중에서도 AuditingEntityListener를 쓰려고 한다.
- 그리고 앞서서 스프링은 처음에 프로그램을 시작할 때, DI container안에 의존성을 주입한다고 했으며,
- 리스너는 미리 이 container안에 넣어서 대기시켜주어야한다고 했다.
* DI container에 의존성을 주입하려면 @Configuration을 붙인 설정 클래스 안에서 @Bean을 불려오는 것으로 할 수 있는데
이 밖에도 @Component 등이 @Bean을 상속하여 붙이는 순간 시작 시 자동으로 의존성이 주입되기도 했다.
- 리스너를 대기시키기 위해 Config 클래스를 하나 만들고 @Configuration과 @EnableJpaAuditing을 붙인다.
@Configuration
@EnableJpaAuditing
public class JpaAuditingConfig {

}
| 정리
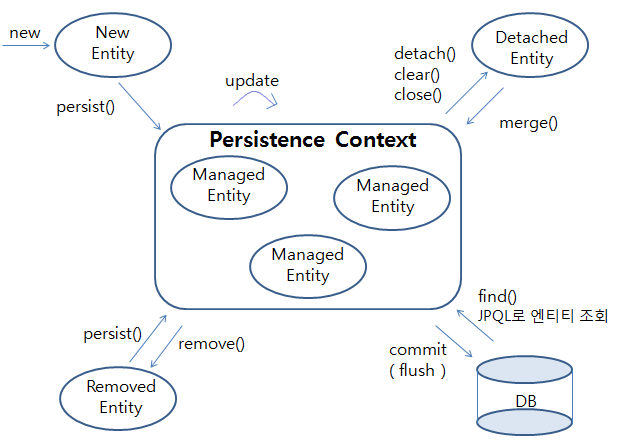
- JPA에서 말하는 영속성이란, DB에 영구적으로 반영되었음을 의미한다.
- @Entity, @EntityListener, @Id, @GeneratedValue 에는 이러한 영속성의 의미가 패키지명에 담겨 있다.
- @EntityListener(AuditingEntityListener.class)는 Entity에 create/update 이벤트가 발생하는 시간을 알려준다. - Entity 내부의 맴버에 @CreatedDate와 @LastModifiedDate를 추가하고, - JpaAuditingConfig 클래스를 만든 후 @Configuration과 @EnableJpaAuditing을 추가하여 사용한다.