■ 사용할 객체

▶ KeyAdaptor

- KeyListener를 구현한 추상클래스이다. 

- getKeyCode() : void    ----  Virtual Code를 확인할 수 있다.

  [참고 : 키보드 정보가 들어오는 방식]
   - 각 회사의 키보드 -> OS/JVM에서 Virtual Key Code로 받음(각 회사 키보드 동일하게 인식)
   - 키보드의 shift+[  ] 예를 들어, 소문자 a를 인식하는 게 아니다. (문자는 모두 대문자로 인식)
   - 말그대로 어떤 키보드를 눌렀는지를 값으로 받는다.

▶ KeyEvent

- VK_xxxxx : Virtual Code Key를 의미하는 상수로, 언더바(_) 다음에 "LEFT","RIGHT","Q","R"등 키보드 키에 대한 상수를 받을 수 있다.

▶ Dimension

- Dimension객체 생성 후, 인스턴스 변수 width/height를 통해 현재 사용하는 컴퓨터의 화면 해상도 얻기 

▶ Toolkit

- Dimension객체를 생성할 때 사용할 클래스다.

- Toolkit : 자원(이미지등) 정보 구하는 객체

- getDefaultToolkit().getScreenSize() : 툴키트 안의 해상도 사이즈를 구하는 메소드이다.

▶ Point

- (x,y)좌표를 입력할 수 있는 객체이다.


■ 키보드 좌(<-)/우(->)/상/하를 누를 때 윈도우창 이동시키기 (단, 모니터 화면 밖으로 나갈 수 없다.)

package window;

import java.awt.Dimension;
import java.awt.HeadlessException;
import java.awt.Point;
import java.awt.Toolkit;
import java.awt.event.KeyAdapter;
import java.awt.event.KeyEvent;
import java.awt.event.WindowAdapter;
import java.awt.event.WindowEvent;
import javax.swing.JFrame;

public class MoveExceptMonitor extends JFrame{
	int screen_w,screen_h; //모니터 화면 해상도 크기
	
	public MoveExceptMonitor() throws HeadlessException {
		super("KeyEvent 연습");
		this.setSize(400,400);
		this.setLocation(200,200);
		this.setVisible(true);
		this.addWindowListener(new WindowAdapter() {

			@Override
			public void windowClosing(WindowEvent e) {
				System.exit(0);
			}
			
		});
		
		//화면 해상도 구하기
		Dimension d = Toolkit.getDefaultToolkit().getScreenSize();
		screen_w = d.width;
		screen_h = d.height;
		
		//키보드초기화
		//키보드 입력시 이벤트를 어떻게 발생시킬 것인지 작성
		init_key_event();
	}
	
	private void init_key_event() {
		KeyAdapter adapter = new KeyAdapter() {

			@Override
			public void keyPressed(KeyEvent e) {
				//눌린 키 정보 얻어보기
				int key = e.getKeyCode();
				
				//현재 윈도우의 위치
				//Point pt = MoveExceptMonitor.this.getLocation();
				Point pt = getLocation();
				
				//현재 객체의 너비/높이
				int sizeWidth = getWidth(); //JDK가 알아서 외부클래스로 인식한다.
				int sizeHeight = getHeight();
				
				if(key==KeyEvent.VK_LEFT) {
					pt.x = pt.x - 10;
					if(pt.x < 0) {
						pt.x = 0;
					}
				}else if(key==KeyEvent.VK_RIGHT) {
					pt.x = pt.x + 10;
					if(pt.x+sizeWidth > screen_w) {
						pt.x = screen_w - sizeWidth;
					}
				}else if(key==KeyEvent.VK_UP) {
					pt.y = pt.y - 10;
					if(pt.y < 0) {
						pt.y = 0;
					}
				}else if(key==KeyEvent.VK_DOWN) {
					pt.y = pt.y + 10;
					if(pt.y+sizeHeight > screen_h) {
						pt.y = screen_h - sizeHeight;
					}
				}
				
				//바뀐 포인트 값으로 윈도우 위치 이동
				setLocation(pt.x,pt.y);
			}
			
		};
		this.addKeyListener(adapter);
	}

	public static void main(String[] args) {
		new MoveExceptMonitor();
	}
}

■ xxxListener/xxxEvent/Action 관계

- 비유 참고 링크 : https://stackoverflow.com/questions/23033439/what-is-the-difference-between-actionlistener-and-actionevent-for-a-button

   [비유] 상점 주인
   - 상점 주인이 가게에 들어와 직원들을 살핀다.
   - 그는 뭔가 문제가 발생한다면 행동을 할 준비를 하고 있다.(ActionListner)
   - 직원A가 일할 시간에 또 사무실에서 잠을 자고 있다.
   - 그는 마음먹은대로 행동을 돌입해야겠다 생각한다.(AcitionEvent)
   - 그는 직원A에게 다음번에 자르겠다 경고한다.(Action)


■ xxxListner와 xxxAdapter의 차이점

- XXXListener는 인터페이스다.

- XXXAdapter는 XXXListener를 구현한 추상클래스이며, 메소드들의 구현부에 {  }만 작성되어 있다.

- XXXListener을 상속할 때는 내부 메소드를 모두 구현해야하지만, XXXAdapter를 상속할 때는 쓰고 싶은 메소드만 골라쓰면 되는 장점이 있다.


■ ActionListener를 구현하는 방법


1. 인스턴스 내부클래스 사용

package window;

import java.awt.event.ActionEvent;
import java.awt.event.ActionListener;
import javax.swing.JButton;
import javax.swing.JFrame;
import javax.swing.JOptionPane;

public class EventTest extends JFrame{
	
	class ButtonListener implements ActionListener{

		@Override
		public void actionPerformed(ActionEvent e) {
			JOptionPane.showMessageDialog(EventTest.this, "Visible");
		}
		
	}

	public EventTest(){
		//윈도우 기본 세팅
		super("EventListenr-인스턴스 내부 클래스");
		setLocation(200,200);
		setDefaultCloseOperation(EXIT_ON_CLOSE);
		setVisible(true);
		
		//버튼 추가
		JButton jbt = new JButton("Click This");
		this.add(jbt,"North");
		
		//버튼 이벤트 추가
		jbt.addActionListener(new ButtonListener());
		
		setSize(400,400);
	}

	public static void main(String[] args) {
		new EventTest();
	}

}


>> 실행결과


2. 로컬 내부클래스 사용

package window;

import java.awt.event.ActionEvent;
import java.awt.event.ActionListener;
import javax.swing.JButton;
import javax.swing.JFrame;
import javax.swing.JOptionPane;

public class EventTest extends JFrame{

	public EventTest(){
		//윈도우 기본 세팅
		super("EventListenr-로컬 내부 클래스");
		setLocation(200,200);
		setDefaultCloseOperation(EXIT_ON_CLOSE);
		setVisible(true);
		
		//버튼 추가
		JButton jbt = new JButton("Click This");
		this.add(jbt,"North");
		
		//버튼 이벤트 추가
		class ButtonListener implements ActionListener{

			@Override
			public void actionPerformed(ActionEvent e) {
				JOptionPane.showMessageDialog(EventTest.this, "Visible");
			}
			
		}
		jbt.addActionListener(new ButtonListener());
		
		setSize(400,400);
	}

	public static void main(String[] args) {
		new EventTest();
	}

}


3. 익명클래스 사용

package window;

import java.awt.event.ActionEvent;
import java.awt.event.ActionListener;
import javax.swing.JButton;
import javax.swing.JFrame;
import javax.swing.JOptionPane;

public class EventTest extends JFrame{

	public EventTest(){
		//윈도우 기본 세팅
		super("EventListenr-익명 클래스");
		setLocation(200,200);
		setDefaultCloseOperation(EXIT_ON_CLOSE);
		setVisible(true);
		
		//버튼 추가
		JButton jbt = new JButton("Click This");
		this.add(jbt,"North");
		
		//버튼 이벤트 추가
		ActionListener listener = new ActionListener() {
			
			@Override
			public void actionPerformed(ActionEvent e) {
				JOptionPane.showMessageDialog(EventTest.this, "Hello My World");
			}
		};
		jbt.addActionListener(listener); 
		
		setSize(400,400);
	}

	public static void main(String[] args) {
		new EventTest();
	}

}


4. 람다식 사용

- (매개변수 -> 구현부)를 한 번에 쓰는 방식 

package window;

import java.awt.event.ActionEvent;
import java.awt.event.ActionListener;
import javax.swing.JButton;
import javax.swing.JFrame;
import javax.swing.JOptionPane;

public class EventTest extends JFrame{

	public EventTest(){
		//윈도우 기본 세팅
		super("EventListenr-익명 클래스");
		setLocation(200,200);
		setDefaultCloseOperation(EXIT_ON_CLOSE);
		setVisible(true);
		
		//버튼 추가
		JButton jbt = new JButton("Click This");
		this.add(jbt,"North");
		
		//버튼 이벤트 추가
		//jbt.addActionListener(ActionListner i);
		//                      ActionListener i 안에 매개변수 e가 있는 메소드로 가서,
		//                      구현부를 작성하기.
		jbt.addActionListener((e)->{JOptionPane.showMessageDialog(EventTest.this, "Visible");}); 
		
		setSize(400,400);
	}

	public static void main(String[] args) {
		new EventTest();
	}

}


■ 4가지 방법을 모두 한 번에 볼 수 있는 예제

package mymain;

import java.awt.GridLayout;
import java.awt.event.ActionEvent;
import java.awt.event.ActionListener;
import javax.swing.JButton;
import javax.swing.JFrame;
import javax.swing.JOptionPane;

public class _04_Hello_Nation extends JFrame {
	
	//Member로서의 내부클래스 선언
	class ButtonEventObject implements ActionListener{

		@Override
		public void actionPerformed(ActionEvent e) {
			//JOptionPane.showMessageDialog(null, "안녕하세요!!"); //null이면, 모니터의 정중앙 -> 윈도우창에 넣으면 창의 정중앙
			JOptionPane.showMessageDialog(_04_Hello_Nation.this, "안녕하세요!!");
			//내부클래스에서 외부클래스를 호출할 때는 _04_Hello_Nation.this
			//내부클래스에서 내부클래스를 호출할 때는 this
		}
		
	}

	public _04_Hello_Nation() {
		super("각 나라 인사말");
		
		GridLayout gl = new GridLayout(6,1);
		this.setLayout(gl);
		
		JButton jbt_kor = new JButton("한국어 인사말");
		JButton jbt_eng = new JButton("영  어 인사말");
		JButton jbt_jpn = new JButton("일본어 인사말");
		JButton jbt_chn = new JButton("중국어 인사말");
		JButton jbt_fra = new JButton("프랑스 인사말");
		JButton jbt_ger = new JButton("독일어 인사말");
		
		this.add(jbt_kor);
		this.add(jbt_eng);
		this.add(jbt_jpn);
		this.add(jbt_chn);
		this.add(jbt_fra);
		this.add(jbt_ger);
		
		//한국어 인사말
		//jbt_kor 버튼 눌렀을 때 이벤트 등록(JVM에게 등록)
		//이벤트 소트.addXXXListener (처리객체가 갖고 있는 interface)
		ButtonEventObject listener = new ButtonEventObject();
		jbt_kor.addActionListener(listener);
		
		//영어 인사말
		//로컬 내부 클래스(Local Inner Class)
		class EngButtonEventObject implements ActionListener{

			@Override
			public void actionPerformed(ActionEvent e) {
				//System.out.println(e);
				JOptionPane.showMessageDialog(_04_Hello_Nation.this, "Hi Everyone!");
			}
			
		}
		jbt_eng.addActionListener(new EngButtonEventObject());
		
		//일본어 인사말
		//익명 내부 클래스
		ActionListener listener2 = new ActionListener() {
			
			@Override
			public void actionPerformed(ActionEvent e) {
				JOptionPane.showMessageDialog(_04_Hello_Nation.this, "곤니치와");				
			}
		};
		jbt_jpn.addActionListener(listener2);
		
		//중국어 인사말
		jbt_chn.addActionListener( new ActionListener() {
			
			@Override
			public void actionPerformed(ActionEvent e) {
				// TODO Auto-generated method stub
				JOptionPane.showMessageDialog(_04_Hello_Nation.this, "니하오마");
			}
		} );
		
		//프랑스어 인사말
		//람다식(Lambda) : 함수 또는 객체 축약식 
		jbt_fra.addActionListener(e->JOptionPane.showMessageDialog(_04_Hello_Nation.this, "봉쥬르"));
		
		//독일어 인사말
		jbt_ger.addActionListener((e) -> {JOptionPane.showMessageDialog(_04_Hello_Nation.this, "구덴 탁");});
		
		//람다식 예시
		//int a = 1, b = 2;
		//int n = (a,b) -> {return a + b;};

		//위치             x   y
		super.setLocation(200, 200);

		//크기
		super.setSize(400, 400);

		//보여주기
		this.setVisible(true);

		//종료
		this.setDefaultCloseOperation(EXIT_ON_CLOSE);
	}

	public static void main(String[] args) {
		new _04_Hello_Nation();
	}
}


[참조]

- 국비지원 수업 내용 참조

 공통부분

- 윈도우창이기에 컨테이너는 JFrame을 사용한다.

- 아래의 예제들에서 JFrame의 세팅값(위치/크기/보임상태/종료버튼방식)은 모두 동일하게 할 것이다.


■ BorderLayout

- JFrame컨테이너의 디폴트 배치관리자는 BorderLayout이다.

- BorderLayout은 컴포넌트 간격을 지정하지 않을 거면 초기화를 딱히 해줄게 없다.

- 컴포넌트를 넣어줄 때 어느 영역(North/South/West/East/Center)에 위치시킬지 지정해준다.

package window;

import java.awt.BorderLayout;
import javax.swing.JButton;
import javax.swing.JFrame;

public class BorderLayoutTest extends JFrame{
	
	BorderLayoutTest(){

		//JFrame의 기본 세팅 메소들 
		this.setTitle("BorderLayout Test");
		this.setLocation(200,200);
		this.setVisible(true);
		this.setDefaultCloseOperation(JFrame.EXIT_ON_CLOSE);
		
		//버튼 컴포넌트를 5개 추가 - add()
		//[레이아웃] 디폴트로 BorderLayout으로 설정되어 있음
		//[1] 먼저 버튼 객체부터 생성한다.
		//    **버튼 생성메소드 JButton("버튼 안에 들어갈 문자열")
		//                               이미지나 아이콘도 넣을 수 있다.
		JButton jbtNorth = new JButton("NORTH");
		JButton jbtSouth = new JButton("SOUTH");
		JButton jbtWest = new JButton("WEST");
		JButton jbtEast = new JButton("EAST");
		JButton jbtCenter = new JButton("CENTER");
		//[2] 버튼을 컨테이너에 넣어둔다. **이때, 버튼이 들어갈 위치를 지정한다.
		this.add(jbtNorth,BorderLayout.NORTH);
		this.add(jbtSouth,"South");
		this.add(jbtWest,BorderLayout.WEST);
		this.add(jbtEast,"East");
		this.add(jbtCenter); //생략시 디폴트 CENTER로 지정
		
		//[유의점] 버튼 컴포넌트들을 먼저 JFrame에 넣어주고 JFrame 사이즈를 잡아줘야 한다.
		//         why? BorderLayout에서는 윈도우창 크기에 따라서 버튼의 너비가 자동 설정되기 때문.
		this.setSize(400,400);


	}

	public static void main(String[] args) {
		new BorderLayoutTest();
	}

}

>> 실행 결과


■ FlowLayout

- JFrame컨테이너의 디폴트 배치관리자는 BorderLayout이다.

- Container의 setLayout() 메소드를 사용해서 레이아웃을 FlowLayout으로 변경한다.

  *레이아웃도 객체이기 때문에 레이아웃 객체 생성을 먼저 해줘야한다.

- FlowLayout을 생성할 때 컴포넌트들의 정렬방식과 수평/수직 간격을 초기화해준다.

  *기본적으로 최상단부터 나열시키는데, 정렬방식은 그의 좌(LEADING), 중간(CENTER), 끝(TRAILING) 중 하나를 고를 수 있다.

package window;

import java.awt.FlowLayout;

import javax.swing.JComboBox;
import javax.swing.JFrame;
import javax.swing.JLabel;

public class FlowLayoutTest extends JFrame{
	
	FlowLayoutTest() {
		//JFrame 기본 세팅
		this.setTitle("FlowLayout Test");
		this.setLocation(400,400);
		this.setVisible(true);
		this.setDefaultCloseOperation(EXIT_ON_CLOSE);
		
		//Container 레이아웃 변경
		//[참고] setLayout()의 매개변수는 LayoutManager 인터페이스다.
		//[생성시] 정렬방식, 수직/수평간격 지정
		this.setLayout(new FlowLayout(FlowLayout.CENTER,10,10));;
		
		//컴포넌트들을 생성해서 넣어준다.
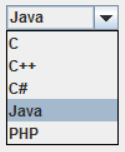
		JLabel label = new JLabel("Select Language");
		this.add(label);
		
		String[] comLang = {"Java","C","C++","PHP","Javascript","python"};
		JComboBox<String> comLangBox = new JComboBox<String>(comLang);
		comLangBox.setSelectedIndex(0);
		this.add(comLangBox);
		
		this.setSize(400,400);
	}
	
	public static void main(String[] args) {
		new FlowLayoutTest();
	}
}

>> 실행결과


■ GridLayout

- Container의 setLayout() 메소드를 사용해서 레이아웃을 GridLayout으로 변경한다.

  *이번에도 레이아웃 객체생성을 먼저한다.

- Grid레이아웃을 생성할 때, 행/열 갯수, 수평/수직 간격을 초기화한다.

- Grid는 행을 우선으로 해서 컨포넌트들의 열의 너비를 지정하므로 이점을 유의한다.

package window;

import java.awt.Color;
import java.awt.GridLayout;

import javax.swing.JFrame;
import javax.swing.JLabel;
import javax.swing.JPanel;

public class GridTest extends JFrame{
	
	public GridTest() {
		super("GridLayout Test");
		setVisible(true);
		setDefaultCloseOperation(EXIT_ON_CLOSE);
		setLocation(200,200);
		
		//Grid로 레이아웃 변경
		GridLayout g = new GridLayout(3,3,10,10);
		this.setLayout(g);
		
		//컴포넌트 생성, 추가
		for(int i = 0; i < 10; i++) {
			JPanel jp1 = new JPanel();
			jp1.add(new JLabel("PANEL"));
			jp1.setSize(30,30);
			Color c = new Color(0xfe9cc3);
			jp1.setBackground(c);
			this.add(jp1);
		}
		
		
		setSize(400,400);
		
	}

	public static void main(String[] args) {
		new GridTest();
	}

}

>> 실행 결과


■ CardLayout

- JFrame 윈도우창의 디폴트 BorderLayout배치는 그대로 둔다.

- 윈도우 창 상단에 패널+버튼들로 탭을 만든다. *패널 - FlowLayout

- 윈도우 창 하단에 패널+패널들로 카드를 만든다. *패널 - CardLayout

  *묶어주는 안에 카드를 넣을 때는, 문장열로 카드명을 지정한다.

package window;

import java.awt.BorderLayout;
import java.awt.CardLayout;
import java.awt.Color;
import java.awt.FlowLayout;

import javax.swing.JButton;
import javax.swing.JFrame;
import javax.swing.JLabel;
import javax.swing.JPanel;

public class CardTest extends JFrame{

	public CardTest(){
		super("GridLayout Test");
		setVisible(true);
		setDefaultCloseOperation(EXIT_ON_CLOSE);
		setLocation(200,200);
		
		//메뉴상단만들기
		JPanel menu = new JPanel(new FlowLayout(FlowLayout.CENTER, 20, 20));
		JButton jbt1 = new JButton("< Previous");
		JButton jbt2 = new JButton("CARD");
		jbt2.setBackground(Color.MAGENTA);
		JButton jbt3 = new JButton("Next >");
		menu.add(jbt1);
		menu.add(jbt2);
		menu.add(jbt3);
		this.add(menu,"North");
		
		//카드 만들기
		JPanel cardSet = new JPanel(new CardLayout());
		cardSet.add(new Screen1(),"s1");
		cardSet.add(new Screen2(),"s2");
		cardSet.add(new Screen2(),"s3");
		this.add(cardSet);
		
		
		setSize(400,400);
	}

	public static void main(String[] args) {
		new CardTest();
	}

}

class Screen1 extends JPanel{

	public Screen1(){
		this.setLayout(new BorderLayout());
		Color c = new Color(0xe43e22);
		JLabel label = new JLabel("안녕!",JLabel.CENTER);
		this.setBackground(c);
		this.add(label,"Center");
	}
	
}
 
class Screen2 extends JPanel{
	public Screen2() {
		this.setLayout(new BorderLayout());
		Color c = new Color(0x1ab6a8);
		JLabel label = new JLabel("잘 지냈어?",JLabel.CENTER);
		this.setBackground(c);
		this.add(label,"Center");
	}
}

class Screen3 extends JPanel{
	public Screen3() {
		this.setLayout(new BorderLayout());
		Color c = new Color(0x985396);
		JLabel label = new JLabel("이번주 주말에 뭐해?",JLabel.CENTER);
		this.setBackground(c);
		this.add(label,"Center");
	}
}

>> 실행 결과


더보기
class SutdaCard{
	//카드의 숫자.(1~10사이의 정수)
	int num; 
	//광이면 true, 아니면 false
	boolean isKwang;
}


더보기
package objectprogm1;

public class Q6_2 {

	public static void main(String[] args) {
		SutdaCard card1 = new SutdaCard(3, false);
		SutdaCard card2 = new SutdaCard();
		
		System.out.println(card1.info());
		System.out.println(card2.info());
	}

}

class SutdaCard{
	final static int MIN_NUM = 1;
	final static int MAX_NUM = 10;
	int num; 
	boolean isKwang;
	
	SutdaCard(){
		this(1, true);
	}
	
	SutdaCard(int num, boolean isKwang){
		this.num = num;
		this.isKwang = isKwang;
	}
	
	String info() {
		return num + (isKwang? "K" : "");
		/*
		   아래에서는 String.format() 사용
		if(isKwang) {
			return String.format("%dK",this.num);
		}else {
			return String.format("%d",this.num);
		}
		*/
	}
}


더보기

class Student{
String name;
int ban;
int no;
int kor;
int eng;
int math;
}


더보기
class Student{
	String name;
	int ban;
	int no;
	int kor;
	int eng;
	int math;
	
	int getTotal() {
		return kor+eng+math;
	}
	
	float getAverage() {
		return (int)(getTotal()/3f*10+0.5)/10f;
	}
}


더보기
package objectprogm1;

public class Q6_5 {

	public static void main(String[] args) {
		Student s = new Student("홍길동",1,1,100,60,76);
		
		System.out.println(s.info());

	}

}

class Student{
	String name;
	int ban;
	int no;
	int kor;
	int eng;
	int math;
	
	Student(){
		this("아무나",0,0,100,100,100);
	}
	
	Student(String name, int ban, int no, int kor, int eng, int math){
		this.name = name;
		this.ban = ban;
		this.no = no;
		this.kor = kor;
		this.eng = eng;
		this.math = math;
	}
	
	String info() {
		return String.format("%s,%d,%d,%d,%d,%d,%d,%.1f",this.name,this.ban,this.no,this.kor,this.eng,this.math,this.getTotal(),this.getAverage());
	}
	
	int getTotal() {
		return kor+eng+math;
	}
	
	float getAverage() {
		return (int)(getTotal()/3f*10+0.5)/10f;
	}
}


더보기
package objectprogm1;

public class Q6_6 {
	
	//두 점 (x,y)와 (x1,y1)간의 거리를 구한다.
	static double getDistance(int x, int y, int x1, int y1) {
		double squareDistance = (x1-x)*(x1-x)+(y1-y)*(y1-y);
		return Math.sqrt(squareDistance);
	}

	public static void main(String[] args) {
		System.out.println(getDistance(1,1,2,2));
	}

}


더보기
package objectprogm1;

class MyPoint{
	int x;
	int y;
	
	MyPoint(int x, int y){
		this.x = x;
		this.y = y;
	}
	
	double getDistance(int x1, int y1) {
		double squareDistance = (x1-this.x)*(x1-this.x)+(y1-y)*(y1-y);
		return Math.sqrt(squareDistance);
	}
}

public class Q6_7 {
	public static void main(String[] args) {
		MyPoint p = new MyPoint(1,1);
		
		System.out.println(p.getDistance(2,2));
	}
}


더보기

- 클래스 변수 : width, height
- 인스턴스 변수 : kind, num
- 지역변수 : k, n, card, args


더보기

static 변수 : weapon, armor 
 static 메소드 : weaponUp(), armorUp()
 //이유 : 모든 병사의 공격력과 방어력이 같다 = 모든 객체 공통으로 적용되는 것


더보기

[6-10] b, e
 b //초기화를 위한 것
 e //오버로딩 가능


더보기

 [6-11] b


더보기

[6-12] c, d
 d//이름만 다르고 타입이 갖으면 결국 같은 메소드


더보기

[6-13] b, c, d


더보기

[6-14] c,e


더보기

[6-15] a


더보기

[6-16] a, e
 d //지역변수는 자신이 선언된 블럭이나 메소드가 종료되면 소멸되므로 메모리 부담이 적다
 e //인스턴스변수를 설명한 것,, 지역변수는 호출스택에 생성된다.


더보기

[6-17] b
 f //열려있는건 다 열려있지만 실행은 f만 하고 있다.


더보기

[정답] 라인 A, B, D

[해설] 

- 라인 A : static변수의 초기화에 인스턴스 변수를 사용할 수 없다.

             꼭 사용해야 한다면 객체를 생성해야 한다.

- 라인 B : static메서드에서는 인스턴스 변수를 사용할 수 없다.

- 라인 C : static메서드에서는 인스턴스메서드를 사용할 수 없다.


더보기

[6-19] 
 ABC123
 After change:ABC123


더보기

예제 답에서는 arr원본 배열을 shuffle해주었는데, 나는 복사한 배열을 shuffle해서 전달해주었다.

shuffle하는 원리는 동일하다.

package objectprogm1;

public class Q6_20 {
	
	static int[] shuffle(int[] arr) {
		
		//매개변수 유효성 검사
		if(arr == null || arr.length == 0) {
			return arr;
		}
		
		//arr을 복사
		int[] sArr = new int[arr.length];
		for(int i = 0; i < arr.length; i++) {
			sArr[i] = arr[i];
		}
		
		//복사본을 shuffle하여 전달
		int tmp;
		int ran;
		for(int i = 0; i < sArr.length; i++) {
			ran = (int)(Math.random()*sArr.length);
			tmp = sArr[i];
			sArr[i] = sArr[ran];
			sArr[ran] = tmp;
		}
		return sArr;
	}
	
	
	public static void main(String[] args) {
		int[] original = {1,2,3,4,5,6,7,8,9};
		System.out.println(java.util.Arrays.toString(original));
		
		int[] result = shuffle(original);
		System.out.println(java.util.Arrays.toString(result));
	}
}


더보기
package objectprogm1;

class MyTv{
	
	boolean isPowerOn;
	int channel;
	int volume;
	final int MAX_VOLUME = 100;
	final int MIN_VOLUME = 0;
	final int MAX_CHANNEL = 100;
	final int MIN_CHANNEL = 1;
	
	void turnOnOff() {
		isPowerOn = !isPowerOn;
	}
	
	void volumeUp() {
		this.volume++;
		if(volume > MAX_VOLUME)
			volume = MAX_VOLUME;
	}
	
	void volumeDown() {
		this.volume--;
		if(volume < MIN_VOLUME)
			volume = MIN_VOLUME;
	}
	
	void channelUp() {
		this.channel++;
		if(channel > MAX_CHANNEL)
			channel = MAX_CHANNEL;
	}
	
	void channelDown() {
		this.channel--;
		if(channel < MIN_CHANNEL)
			channel = MIN_CHANNEL;
	}
}//end MyTv

public class Q6_21 {

	public static void main(String[] args) {
		MyTv t = new MyTv();
		
		t.channel = 100;
		t.volume = 0;
		System.out.println("CH:"+t.channel+", VOL:"+ t.volume);
		
		t.channelDown();
		t.volumeDown();
		System.out.println("CH:"+t.channel+", VOL:"+ t.volume);
		
		t.volume = 100;
		t.channelUp();
		t.volumeUp();
		System.out.println("CH:"+t.channel+", VOL:"+ t.volume);
	}
}//end class


더보기
static boolean isNumber(String str) {

    //매개변수 유효성 검사
    if(str == null || str.equals("")) {
        return false;
    }

    for(int i = 0; i < str.length(); i++) {
        int ch = str.charAt(i);
        if(!(ch>='0'&&ch<='9')) {
            return false;
        }			
    }
    return true;
}


더보기
static int max(int[] arr) {

    if(arr == null || arr.length == 0) {
        return -999999;
    }

    int max_num = arr[0];
    for(int i = 1; i < arr.length; i++) {
        if(arr[i]>max_num) {
            max_num = arr[i];
        }
    }

    return max_num;

    /*
    int max_num = 0;
    for(int i = 0; i < arr.length-1; i++) {
        if(arr[i]>arr[i+1]) {
            max_num = arr[i];
        }else {
            max_num = arr[i+1];
        }
    }
    */	
}


더보기
static int abs(int value) {
		
    return value<0? -value : value;
    /*
    if(value<0) {
        return -value;
    }else {
        return value;
    }
    */
}


더보기
package control;

public class Q4_1 {

	public static void main(String[] args) {
		int x = 10;
		char ch = ' ';
		int year = 430;
		boolean powerOn = false;
		String str = "yes";
		
		//1번
		if(x > 10 && x <20) {
			
		}
		
		//2번
		if(ch != ' ' || ch != '\t') {
			
		}
		
		//3번
		if(ch == 'X' || ch == 'x') {
			
		}
		
		//4번
		if(ch >= '0' && ch <= '9') {
			
		}
		
		//5번
		if((ch >= 'A' && ch <= 'Z')||(ch >= 'a' && ch <='z')) {
			
		}
		
		//6번
		if((year%400==0||year%4==0)&&(year%100!=0)) {
			
		}
		
		//7번
		if(!powerOn) { //= if(powerOn!=true)
			
		}
		
		//8번
		if(str.equals("yes")) {
			
		}
		
	}

}


더보기

73


package control;

public class Q4_2 {

public static void main(String[] args) {
int sum = 0;
for(int i = 1; i <= 20; i++) {
if(i % 2 != 0 && i %3 != 0) {
sum += i;
}
}
System.out.println("sum : "+sum);
}

}


더보기

220


package control;

public class Q4_3 {

	public static void main(String[] args) {
		int sum = 0;
		for(int i = 1; i<=10; i++) {
			for(int j = 1; j<=i; j++) {
				sum += j;
			}
		}
		System.out.println("sum : "+sum);
	}

}


더보기

199


package control;

public class Q4_4 {

	public static void main(String[] args) {
		int num = 0; 
		int sum = 0; //총합
		int s = 1; //값의 부호를 바꿔주는 변수
		
		for(int i = 1; ; i++, s=-s) {
			num = i * s;
			sum += num;
			
			if(sum >= 100) break;
		}
		System.out.println("num : "+num);
		System.out.println("sum : "+sum);
	}

}


더보기
package control;

public class Q4_5 {

	public static void main(String[] args) {
		int i = 0;
		while(i <= 10) {
			int j = 0;
			while(j <=i) {
				System.out.print("*");
				j++;
			}
			System.out.println();
			i++;
		}
	}

}


더보기

>> 실행결과

[1, 5]
[2, 4]
[3, 3]
[4, 2]
[5, 1]

package control;

public class Q4_6 {

	public static void main(String[] args) {
		//주사위 2개 - 6x6 = 36가지
		for(int i = 1; i <= 6; i++) {
			for(int j = 1; j <= 6; j++) {
				if(i+j==6) {
					System.out.printf("[%d, %d]\n",i,j);
				}
			}
		}
	}

}


더보기
package control;

public class Q4_7 {

	public static void main(String[] args) {
		int value = (int)(Math.random()*6)+1;
		System.out.println("value:"+value);
	}

}


더보기
package control;

public class Q4_8 {

	public static void main(String[] args) {
		for(int x = 0; x < 11; x++) {
			for(int y = 0; y < 11; y++) {
				if(2*x+4*y==10) {
					System.out.printf("x=%d, y=%d\n",x,y);
				}
			}
		}
	}

}


더보기

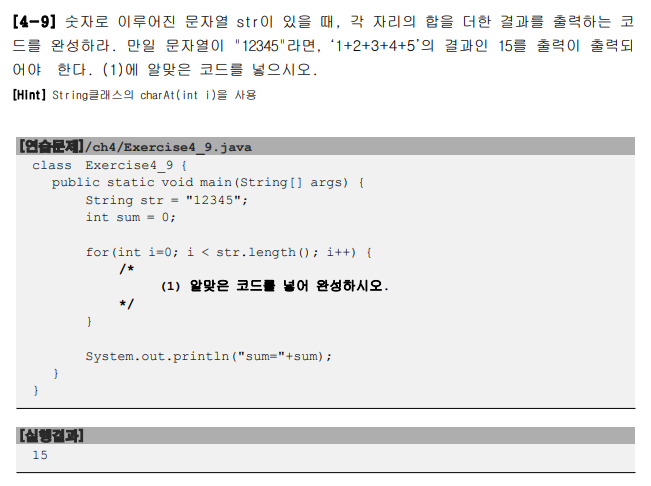
int tmp = str.charAt(i)-'0';
sum += tmp;


더보기
int tmp = num;
		
while(tmp>0) {
    sum += tmp%10;
    tmp = tmp/10;
}


더보기
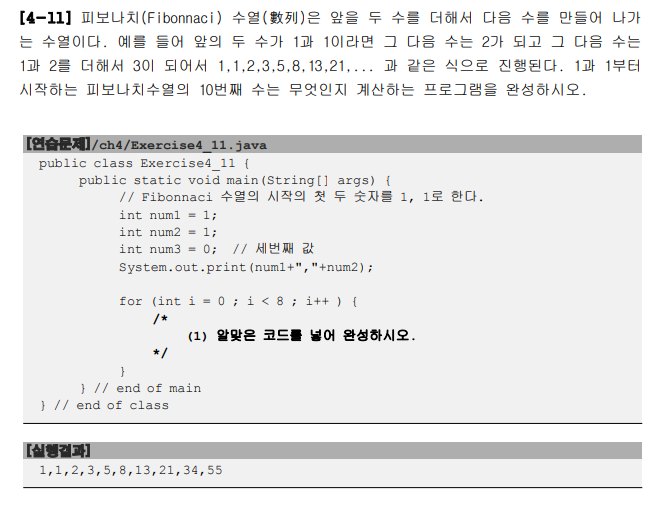
package control;

public class Q4_11 {

	public static void main(String[] args) {
		int num1 = 1;
		int num2 = 1;
		int num3 = 0;
		
		System.out.print(num1+","+num2);
		
		for(int i = 0; i < 8; i++) {
			num3 = num1 + num2;
			System.out.print(","+num3);
			num1 = num2;
			num2 = num3;
		}
	}

}


더보기
package control;

public class Q4_13 {

	public static void main(String[] args) {
		String value = "12o34";
		char ch = ' ';
		boolean isNumber = true;
		
		for(int i = 0; i < value.length(); i++) {
			ch = value.charAt(i);
			if(!(ch >= '0' && ch <= '9')) {
				isNumber = false;
				break;
			}
		}
		
		if(isNumber) {
			System.out.println(value+"는 숫자입니다.");
		}else {
			System.out.println(value+"는 숫자가 아닙니다.");
		}
	}

}


더보기
package control;

public class Q4_14 {

	public static void main(String[] args) {
		int answer = (int)(Math.random()*100)+1; //1~100사이 컴터숫자
		int input = 0; //사용자 입력숫자
		int count = 0; //시도횟수
		
		java.util.Scanner s = new java.util.Scanner(System.in);
		
		do {
			count++;
			System.out.print("1과 100사이의 값을 입력하세요 : ");
			input = s.nextInt();
			
			if(input == answer) {
				System.out.println("맞췄습니다.");
			}else if(input > answer) {
				System.out.println("더 작은 수를 입력하세요.");
			}else{
				System.out.println("더 큰 수를 입력하세요.");
			}
			
			if(count >= 6) {
				System.out.println("시도횟수는 6번입니다.");
				break;
			}
		}while(true);
		
		s.close();
	}

}


더보기
package control;

public class Q4_15 {

	public static void main(String[] args) {
		int number = 12321;
		int tmp = number;
		
		int result = 0; //변수 number를 거꾸로 변환해서 담을 변수
		
		while(tmp != 0) {
			result = result*10+tmp%10;
			tmp = tmp/10;
		}
		
		if(number == result)
			System.out.println(number + "는 회문수 입니다.");
		else 
			System.out.println(number + "는 회문수가 아닙니다.");
	}

}


■ 배치관리자(LayoutManager)

- 레이아웃의 조상 인터페이스이다.


■ 레이아웃이란?

- 레이아웃은 컴포넌트들을 배치하는 방식을 말하는 것으로,

  이 방식에 따라 컨테이너 안에 추가되는 컴포넌트의 위치와 크기를 자동적으로 결정한다.

- 레이아웃 곧, 배치 방식도 하나의 객체이므로, 객체 생성 후 사용이 가능하다.

  (단, 컨테이너처럼 디폴트로 가진 레이아웃 방식이 있는 경우 반드시 레이아웃 객체를 생성할 필요가 없다)


■ 레이아웃의 종류

배치방식 특징
BorderLayout 컴포넌트를 동서남북, 중간에 배치할 수 있다.
*JFrame,JApplet,JDialog의 디폴트 배치관리자
FlowLayout 컴포넌트를 최상단에서 좌->우로 배치한다.
*JPanel, Applet의 디폴트 배치관리자
GridLayout 컴포넌트를 바둑판 형식으로 배치(행과 열)
*행을 기준으로 열의 갯수가 자동 지정
CardLayout 여러 장의 카드를 겹쳐놓은 형태
BoxLayout (생략)


더보기

참조 -- 

아래 내용부터는 https://movefast.tistory.com/46 내용을 일부 수정, 요약하였다.

■ BorderLayout

- 최상위 컨테이너 JFrame, JApplet, JDialog는 BorderLayout방식을 따른다.

  만약, 컨테이너 내에 컴포넌트 객체를 추가할 경우, 아래와 같이 컴포넌트가 배치될 영역을 지정한다.

   add(객체명, "East"); 또는 add(객체명, BorderLayout.EAST);

- 컴포넌트가 배치될 영역을 지정하지 않으면 자동으로 Center로 배치된다.

- 같은 위치에 컴포넌트를 추가하면 뒤 컴포넌트가 앞 컴포넌트를 가릴 수 있다.

생성자/메소드 설명
BorderLayout()  
BorderLayout(int hgap, int vgap) hgap : horizonal gap, vgap : vertical gap
수평, 수직 간격을 생성과 동시에 지정
setHgap(int hgap) : void 수평 간격 지정
setVgap(int vgap) : void 수직 간격 지정


■ FlowLayout

- JPanel의 디폴트 배치관리자.

- 너비를 벗어날 경우 다음 줄에서 다시 배치 시작

생성자 설명
FlowLayout() 기본 설정 : 중앙배치, 수평 수직 5px간의 간격
FlowLayout(int align) align = 정렬 방식
FlowLayout.LEADING, FlowLayout.CENTER, FlowLayout.TRAILING
FlowLayout(int align, int vgap, int hgap) 정렬방식, 수평간격, 수직간격 설정


■ GridLayout

- 행과 열의 바둑판 형식으로 컴포넌트 배치 

- 모든 컴포넌트의 크기는 같으며, 모든 공간을 컴포넌트로 채운다.

- 행을 기준으로 격자를 맞추는 것이 원칙이다.

- 윈도우의 크기를 변경하면 그 크기에 맞추어 컴포넌트의 크기가 자동 변경된다.

생성자 설명
GridLayout(int rows, int cols) 기본 설정 : 컴포넌트 수에 맞춰 자동 설정됨
수동 설정 : 행, 열 갯수 입력
GridLayout(int rows, int cols, int hgap, int vgap) 행, 열, 수평간격, 수직간격


■ CardLayout

- 여러 장의 컨테이너 객체(카드)를 겹겹이 겹쳐 놓은 형태

- 하나의 컨테이너의 배치 방식을 CardLayout로 하고, 그 안에 다수의 컨테이너를 묶는다.

생성자/메소드 설명
CardLayout()  
CardLayout(int hgap, int vgap) 수평 수직간격 설정
previous(Container parent) : void 
이전 순서의 컨테이너 show
next(Container parent) : void 
다음 순서의 컨테이너 show
first(Container parent) : void  첫번째 순서의 컨테이너 show
last(Container parent) : void 
마지막 순서의 컨테이너 show
show(Container parent, String s) : void 
특정 이름(문자열)의 컨테이너 show


[참조]

- 블로그 https://movefast.tistory.com/46

- 오라클 https://docs.oracle.com/javase/7/docs/api/java/awt/LayoutManager.html

■ JFrame 컨테이너

- Container 상속 : 컴포넌트를 추가(add)/지우기(remove), 컨테이너 내 배치방식(Layout) 설정

- JFrame 기능 : 컨테이너의 타이틀, 사이즈, 위치 등을 설정 가능 

- JFrame은 기본적으로 Border Layout방식을 따른다. **이 부분은 별도 포스팅 예정이며 여기서는 불필요한 내용이다.

메소드 정리

■ 그림으로 표현한 JFrame


■ 코드화

   [유의할 점]
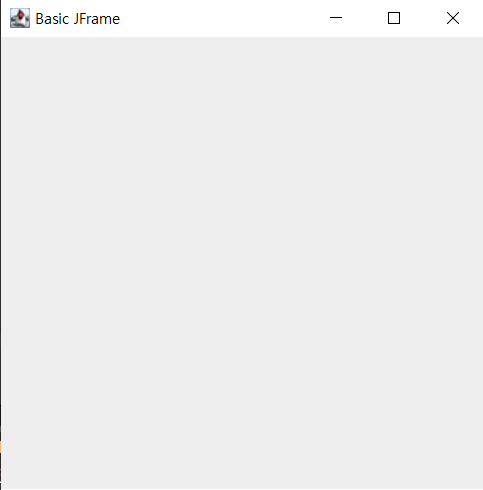
   - DefaultCloseOperation설정을 하지 않으면 [x]를 누를 때 숨김처리(Not Visible)된다.
      * [x] 선택 시, 프로그램을 종료하려면 EXIT_ON_CLOSE 해주기
package window;

import javax.swing.JFrame;

class BasicJFrame extends JFrame{
	BasicJFrame(){
		
		this.setTitle("Basic JFrame");
		//또는 super("Title"); 로 타이틀 지정 가능하다.
		
		this.setLocation(200,200);
		
		this.setSize(400,400);
		
		this.setVisible(true);
		
		this.setDefaultCloseOperation(EXIT_ON_CLOSE);
	}
}

public class JFrameTest{
	public static void main(String[] args) {
		new BasicJFrame();
	}
}

>> 결과

1. GUI란?

- GUI는 사용자가 컴퓨터와 눈에 보이는(Graphic) 상호작용(interface)을 할 수 있게 한 것
- GUI의 종류 : AWT패키지, Swing패키지

AWT(Abstract Windowing Toolkit)
- AWT은 중량 컴포넌트(heavy weight)이며, 운영체제의 자원을 사용한다. 운영체제에 부담되나 속도 빠르다.

Swing
- Swing은 AWT를 확장한 경량 컴포넌트(Light weight)이며, 다양한 플랫폼에도 사용할 수 있게 했다.


2. GUI의 전체 구조도

- 이미지 참조 링크 : https://myeonguni.tistory.com/1006

참조 : 명우니 닷컴


3. 컴포넌트란?

- 윈도우창에 들어가는 모든 독립적인 단위모듈컴포넌트라고 한다.
- 이 중에서 다른 컴포넌트를 하나로 묶어주는 컴포넌트를 컨테이너라 한다.
- 컨테이너 컴포넌트의 조상은 AWT패키지의 Cotainer이다.
- 컨테이너 외의 컴포넌트들의 조상은 Swing패키지 내에서 JComponent이다.

3-1) Container와 JComponent의 주요 메소드

(AWT) Container

관련 메소드
컴포넌트 getter
컴포넌트 추가
getComponent() : Component
add(Component comp) : Component
add(String name, Component comp) : Component
add(Component comp, int index) : Component
add(Component comp, Object constraints) : void
add(Component comp, Object constraints, int index) : void
컴포넌트 제거 remove(int index) : void
remove(Component comp) : void
removeAll() : void
레이아웃(배치방식) 설정 setLayout(LayoutManager mgr) : void


(Swing) JComponent

- 참조 : https://m.blog.naver.com/rain483/220735906752

관련 메소드 설명
모양 void setForeground(Color)
void setBackground(Color)
void setOpaque(boolean)
void setFont(Font)
Font getFont()
전경색 설정
배경색 설정
불투명성 설정
폰트 설정
폰트 리턴
위치와 크기 int getWidth()
int getHeight()
int getX()
int getY()
Point getLocationOnScreen
void setLocation(int, int)
void setSize
폭 리턴
높이 리턴
x좌표 리턴
y좌표 리턴
스크린 좌표상에서의 컴포넌트 좌표
위치 지정
크기 지정
상태 void setEnable(boolean)
void setVisible(boolean)
boolean isVisible()
컴포넌트 활성화/비활성화
컴포넌트 보이기/숨기기
컴포넌트의 보이는 상태 리턴
컨테이너 Container getParent()
Contaienr getTopLevelAncestor()
부모 컨테이너 리턴
최상위 부모 컨테이너 리턴


3-2) Swing 컨테이너

- 컨테이너는 가벼운 컴포넌트들을 하나로 묶기 위해 사용된다.

종류 이름 내용 default 배치방식
최상위
컨테이너
JFrame 윈도우창 BoderLayout
JApplet 브라우저 내에서 작동하는 윈도우창 BoderLayout
JDiaglog 일종의 메세지창/
알럿과 같은 대화상자 형식의 애플리케이션에 적합
BoderLayout
JWindow (생략) (생략)
일반 JPanel 컴포넌트를 패널형식으로 묶음 FlowLayout


3-3) 가장 많이 사용되는 13가지 컴포넌트

- 코드 설명 번역 ) 가장 많이 사용하는 13가지 컴포넌트 https://www.educba.com/swing-components-in-java/

이름 그림/설명 코드
ImageIcon (생략) ImageIcon homeIcon = new ImageIcon(“src/images/home.jpg”);
JButton

<생성자의 인자>
- 문자열 또는 이미지
- 이미지+문자열도 가능
JButton okBtn = new JButton(“Ok”);

JButton homeBtn = new JButton(homeIcon);

JButton btn2 = new JButton(homeIcon, “Home”);
JLabel checkbox, button등에 붙는 라벨
*독자적으로 사용 가능
JLabel textLbl = new JLabel(“This is a text label.”);

JLabel imgLabel = new JLabel(homeIcon);
JComboBox

<생성자의 인자>
- 문자열 배열
String[] cityStrings = { "Mumbai", "London", "New York", "Sydney", "Tokyo" };
JComboBox cities = new JComboBox(cityList);
cities.setSelectedIndex(3);
JCheckBox

<생성자의 인자>
- 옆에 붙는 라벨 문자열
- default체크값(on= true)
CheckBox chkBox = new JCheckBox(“Show Help”, true);
JRadioButton


<생성자의 인자>
- 옆에 붙는 라벨 문자열
- default체크값(on= true)
*ButtonGroup으로 집합가능
ButtonGroup radioGroup = new ButtonGroup();
JRadioButton rb1 = new JRadioButton(“쉬움”, true);
JRadioButton rb2 = new JRadioButton(“중간”);
JRadioButton rb3 = new JRadioButton(“어려움”);
radioGroup.add(rb1);
radioGroup.add(rb2);
radioGroup.add(rb3);
JTextField

<생성자의 인자>
- 컴포넌트 설명하는 문자열
- 너비(=열의 갯수)
*글자수 제한 없음
JTextField txtBox = new JTextField(20);
JTextArea

<생성자의 인자>
- 컴포넌트 설명하는 문자열
- 높이(행 갯수), 너비(열 갯수)
JTextArea txtArea = new JTextArea(“This text is default text for text area.”, 5, 20);
JPasswordField
(extends JTextField)
JPasswordField pwdField = new JPasswordField(15);
var pwdValue = pwdField.getPassword();
JList
DefaultListItem cityList = new DefaultListItem();
cityList.addElement(“Mumbai”):
cityList.addElement(“London”):
cityList.addElement(“New York”):
cityList.addElement(“Sydney”):
cityList.addElement(“Tokyo”):
JList cities = new JList(cityList);
cities.setSelectionModel(ListSelectionModel.SINGLE_SELECTION);
JFileChooser
JFileChooser fileChooser = new JFileChooser();
JButton fileDialogBtn = new JButton(“Select File”);
fileDialogBtn.AddEventListner(new ActionListner(){
fileChooser.showOpenDialog();
})
var selectedFile = fileChooser.getSelectedFile();
JTabbedPane
JTabbedPane tabbedPane = new JTabbedPane();
tabbedPane.addTab(“Tab 1”, new JPanel());
tabbedPane.addTab(“Tab 2”, new JPanel());
JSlider
JSlider volumeSlider = new JSlider(0, 100, 50);
var volumeLevel = volumeSlider.getValue();


3-3) 그외

이름 그림
JProgressBar
JToolTip
JMenu


[참고]
- awt와 swing의 차이 - https://diaryofgreen.tistory.com/140
- 컴포넌트란? - https://mommoo.tistory.com/55
- 명우니닷컴 https://myeonguni.tistory.com/1006
- 가장 많이 사용하는 13가지 컴포넌트 https://www.educba.com/swing-components-in-java/
- JComboBox 콤보박스 - https://movefast.tistory.com/63
- JList https://lunaticlobelia.tistory.com/118
- JProgrssBar https://www.javatpoint.com/java-jprogressbar
- JToolTip https://log.hanjava.net/post/2466129264/jtooltip-%EC%9D%B4%EC%95%BC%EA%B8%B0-i
- JMenu https://www.javatpoint.com/java-jmenuitem-and-jmenu
- JDiaglog in java https://www.educba.com/jdialog-in-java/
- JFileChooser https://creatordev.tistory.com/51
- GUI개요 https://m.blog.naver.com/PostView.naver?isHttpsRedirect=true&blogId=sks6624&logNo=150164573882
- 알통몬의 인생 https://m.blog.naver.com/rain483/220735906752

[이클립스에서 템플릿 만들기]

[0] 저장할 소스를 긁어서 Ctrl+c로 복사합니다.

[1][2] [window] > [Preferences] 로 들어갑니다.

[3] 검색창에 "temp"를 쓰고,  [Java] > [Editor] > [Templates]로 이동합니다.

[4] [New]를 눌러 새 템플렛 만드는 창을 엽니다.

[5] 제목을 적어줍시다.

[6] 긁어온 코드를 Ctrl+v로 붙여줍니다.

[7] 클래스명을 드래그한 뒤 [Insert Variable]의 [Primary_type_name](환경변수)로 바꿔줍니다.

    *객체명의 경우 [Primary_type_name]

    *인자로 설정할 경우 [args]

[8] [Ok]를 눌러 완료한 뒤, [Apply]후 창을 빠져나옵니다.


[새로운 워크스페이스에 기존 템플릿을 넣기]

- Copy Settings에서 Preferences를 체크

+ Recent posts